Lighting Food Photography With Fujifilm X-T4
Lighting Food Photography With Fujifilm X-T4


One of the questions I get from time to time is whether I shoot with a flash or prefer natural lighting. Over the last decade, I’d say my work has steered towards natural light, not because I don’t like the look of strobes, but because a lot of my work is requires me to shoot fast and also internationally.
When I travel, I prefer to do it light so I don’t get weighed down by equipment. So my preference for natural light has largely been influenced by habit, more than anything.
2020 and 2021 has seen us spending more time at home than usual, so I decided to revisit the subject of artificial lighting to continue my education and challenge me creatively. Dusting off my box of strobes and various lights, I decided to do an inventory check to see what was worth keeping and what needed upgrading.
It has been a very rewarding process and I’ve decided to do a series to share the behind the scenes of how I light different shoots, my setup, and my workflow process. This one is all about how I use a one light setup to illuminate my food photography.
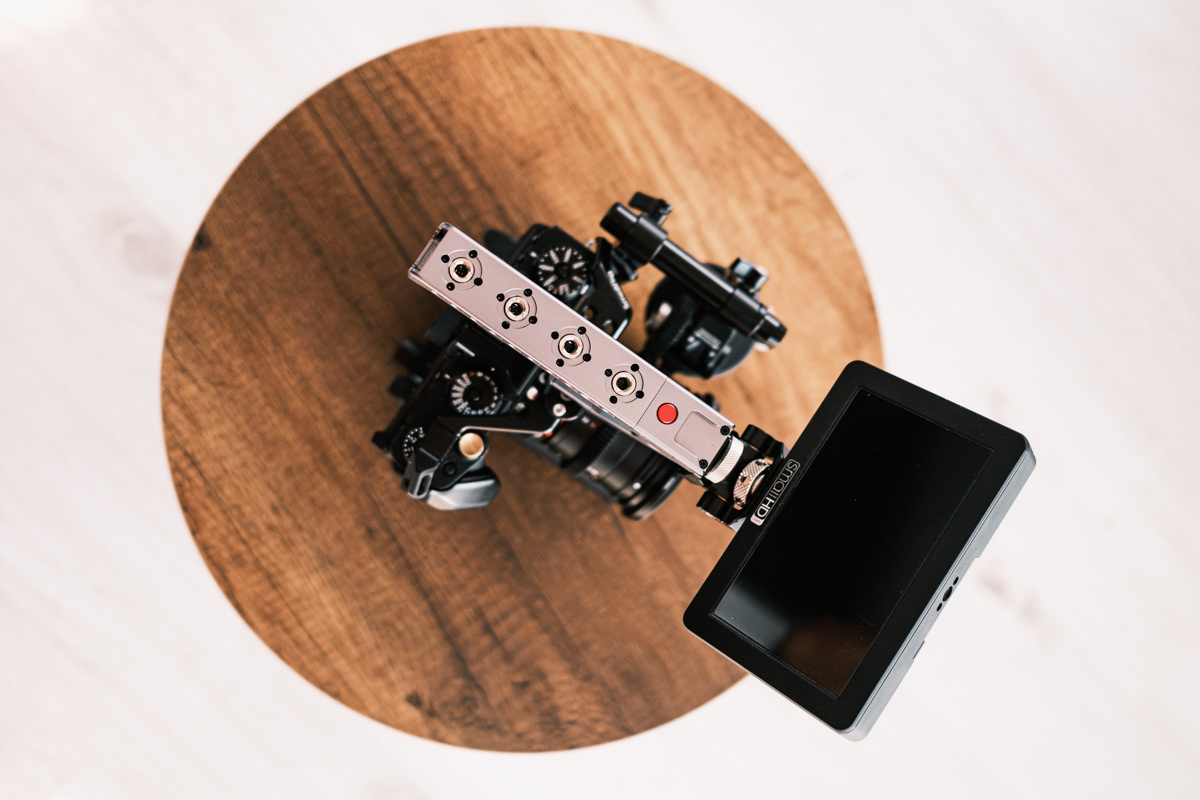
I’ve shot everything here with the Fujifilm X-T4 after I did a full system migration from Sony.
The One Light Setup Every Photographer Should Own
I want to begin with what I consider the most simple and yet one of the most effective setup for lighting. This kit includes:
1x LED video light
1x one soft box light modifier
1x light stand
The whole setup is easy to use and so versatile that I use it for everything from food photography to fashion photography, lighting my YouTube videos and all my interview subjects for short documentaries and brand videos I shoot.

In this post, I’ll focus specifically on food photography, but the principle carries across many types of shooting disciplines.
My specific version of this setup is also very lightweight and compact that I’ve started taking it with me on my travels. It starts with the Godox SL60W. This high power LED video light runs about $134 and gives me daylight balanced 5600K continuous light. As far as a continuous light goes, this is very good value for your money and comparable to the well-loved Aputure 120D that costs 6 times as much. With this, I get plenty of light for most of my shooting scenarios.
Continuous Video Light For Food Photography
So wait. Why am I recommending a continuous video light for food PHOTOGRAPHY?
Simple, for ease of use and experimenting. Unlike a strobe, what you see is what you get. This is very useful because you know exactly how the light falls on the different parts of the dish. I can adjust the dish and see precisely what it will look like without having to take a test shot. I’ll go into detail below.
But wouldn’t a strobe be more versatile and give you more light? Yes, even a small basic external flash will usually give you more light than many continuously lit LED, but when it comes to shooting food, I often don’t need that much light. It has to do with how far I position the light from the food – and usually it’s not far.
There is a trade-off between power/luminance and ease of use and I prefer the latter. If you’re beginning out with lighting, this is a great way to see exactly how light works.
The Most Important Rules About Lighting That You Need Know
The bigger the light source, the softer the light. Inversely, the smaller the light source, the harsher the light will be.
This is where the softbox come in. A softbox is a type of light modifier that diffuses and spreads the light out over a large area. They come in all sorts of shapes and sizes, from squares and rectangles to octagons and long thing boxes.
The actual LED light on the Godox SL60W is about a 1” x 1.5” light. It’s bright, but it’s also a small source of light. If I lit a subject with the SL60W on its own, the light would be very harsh and create a lot of shadows. Sometimes, I want this, but most of the time I don’t.
So I put on a 37” Godox Octabox with a honeycomb grid turning that 1” light into a much larger light and softer light source. The closer I move the octabox to the my subject, the softer and brighter it will be. This octabox comes with a standard Bowens mount that allows you to easily attach most types of strobes and continuous lights like the SL60W.
The Indispensable Honeycomb Grid Diffuser
The honeycomb grid is another must have accessory when it comes to modifier light. This webbing of square boxes goes in front of the softbox and directs the light forward to prevent it from spraying out beyond the subject. This gives you a lot more control with your light so you don’t light up the background, when you don’t want to. I’ll go more into why this is great for shooting food.
Choosing A Good Light Stand
The last component to a good lighting setup is a heavy duty light stand to hold the flash. You can use almost any light stand to hold this setup, but the heavier it is, the sturdier it will be and more angles you can mount on lights.
Personally, I keep a few different stands in my inventory varying in size and height, but the one I use most often and on the road is a no brand compact, but heavy duty light stand that compacts down to 18.9” and expands out to 84” (7 feet). This allows me to take it in any of my luggage, even a carry on. It’s not as as sturdy as something like this, but I’ve never had any problems with it, especially with the SL60W and octabox. It comes with a 3.8” – 16 treaded stud on top so it fits most lights/umbrellas/softbox, etc.
Why I Chose The Godox SL60W
I own a few lights besides the Godox SL60W (studio video light), including a nice Godox DP400III high powered strobe (indoor studio), a Godox AD200Pro (portable studio) and a couple of these popular Neewer 660 LED Panels (portable video light). In a studio, I can use multiple combination of these lights to get every possible lighting setup I would need.
On the road, I will either bring the AD200Pro if I’m planning to only do photos and the Godox SL60W if I plan to shoot YouTube videos. If I had to choose one out of spacing concern, I bring the SL60W because it can function for both video and photo work. The SL602W, the DP400III and the AD200Pro (with a mount adapter) all work with the light stand and octabox above.
Quick Setup
Earlier, I mentioned recommending a continuous video light for this setup because of ease of use. Let’s go deeper into that.
Setting up the whole thing takes me about 5 minutes from start to finish, with the bulk of the time putting together the octabox. Once I insert all the rods into the Bowens mount and open up the octabox, I have the first option to add a diffusion layer about 6” away from the light source. The main diffusion layer velcros on at the front of the octabox, with enough space left to velcro on the grid.
I like to put on both diffusers and the grid to get a very clean and direct light that is nice and soft.
With the SL60W on, I can turn the power dial from 10% to 100% to see the range of how much light I can get. When I expose for the scene on my camera, I can see exactly what the final shot will look like. It is incredibly fast.
The SL60W also comes with a remote so I can control the light without having to reach for the dial on the back, especially if it’s high up.
How To Modify Your Softbox
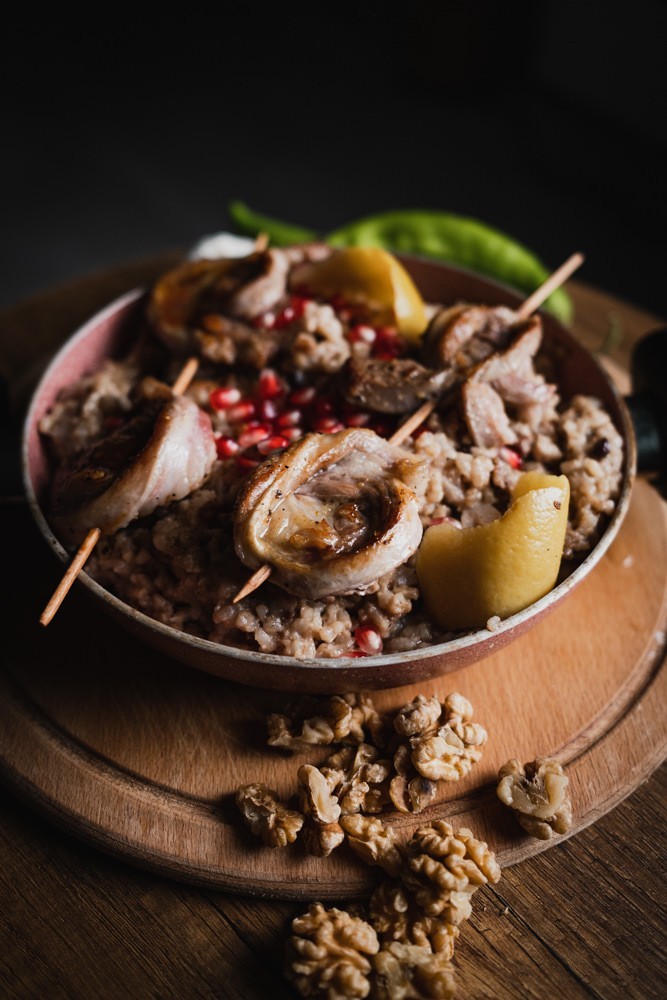
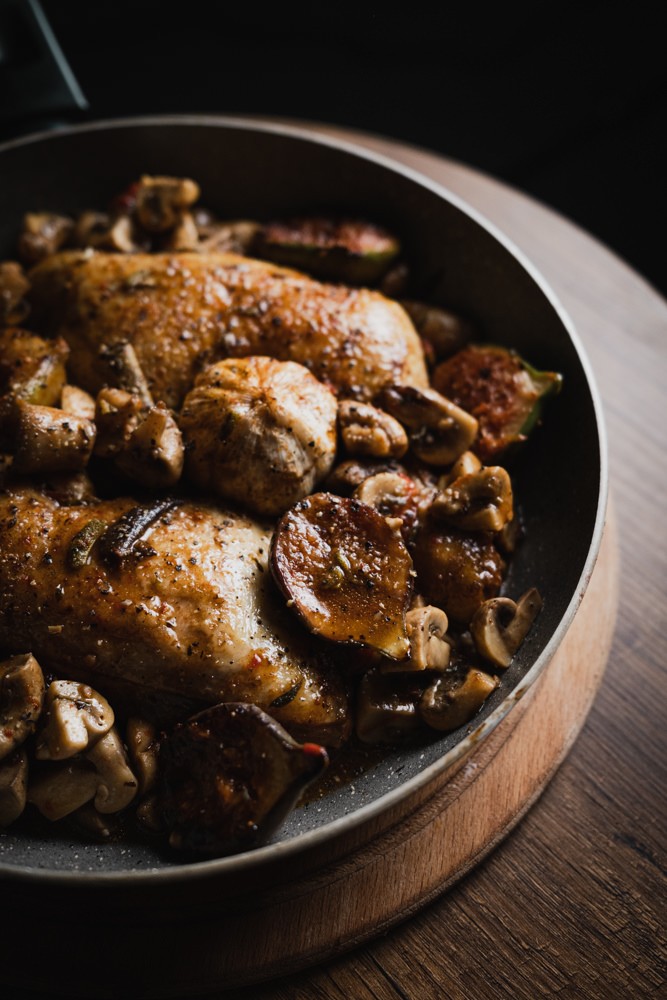
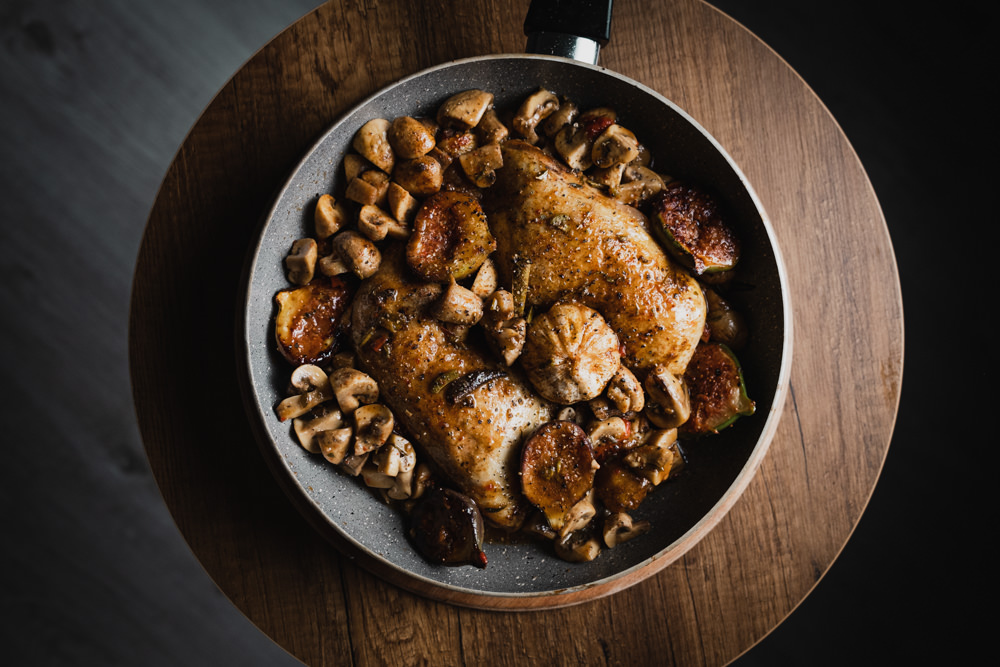
If I shooting a finished plate, the first thing I usually look for is the topography of the different ingredients. In other words, what components stick out. This will help me figure out the aperture I need to use, but it also gets me to think about if a directional light will be blocked for certain parts of the dish.
With a strobe flash, I usually need to expose for the ambient, and then manually adjust the strobe settings to get the final exposure that I want. If I make an adjustment, I will need to take a test shot to see what changes.
With a continuous light, I only do one exposure – for the scene. What you see is what you get. I can rotate the dish around, rearrange certain parts of it and I’ll see exactly how it will look like.
For someone just learning, this is the absolute fastest way to understand what your lighting setup does. Keeping my exposure the same, I go backwards with my diffusion layers and remove them one by one.
My first shot will have both diffusion layer and the grid.
My second shot will have both diffusion layer without the grid.
My last shot will have only the main diffusion later without the grid.
Sometimes, the changes are subtle, sometimes the part of a scene that the light change affects isn’t even in the frame. But you will be able to see it and you will better know when you should use which setup.
How To Angle Your Light
Remember that moving the light closer will make it brighter and also spread the light out more evenly and softly. Move it away, and the scene gets darker as well and the shadows more distinct. Try this out and adjust your exposure, to see which type of shadows you prefer.
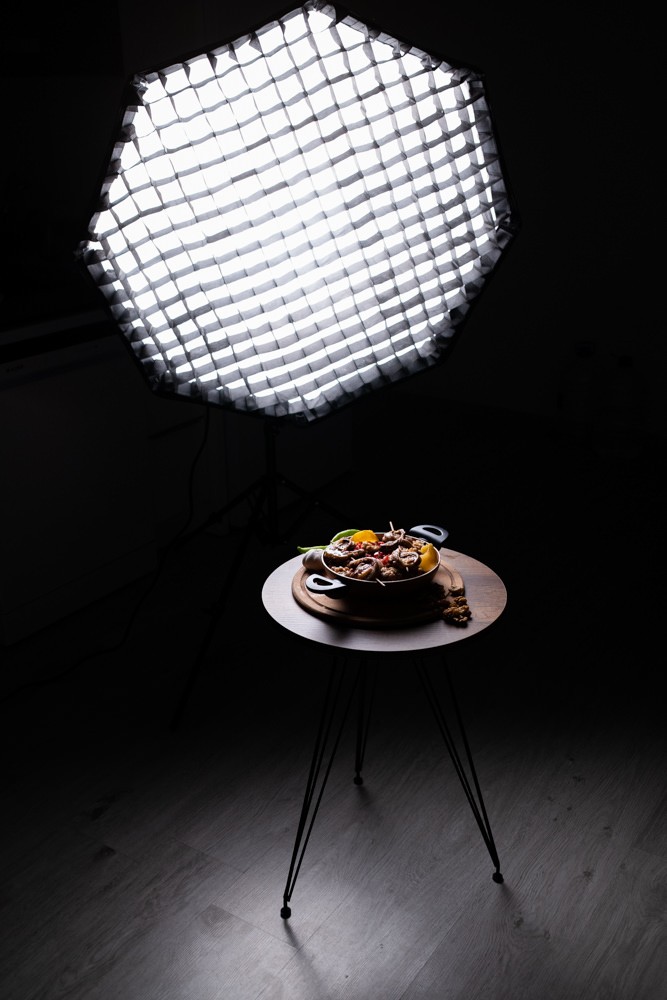
Farther Away For Dramatic Lighting
For a more dramatic scene with a darker table, I usually place a light source a little farther away, about 3-5 feet away from the dish.
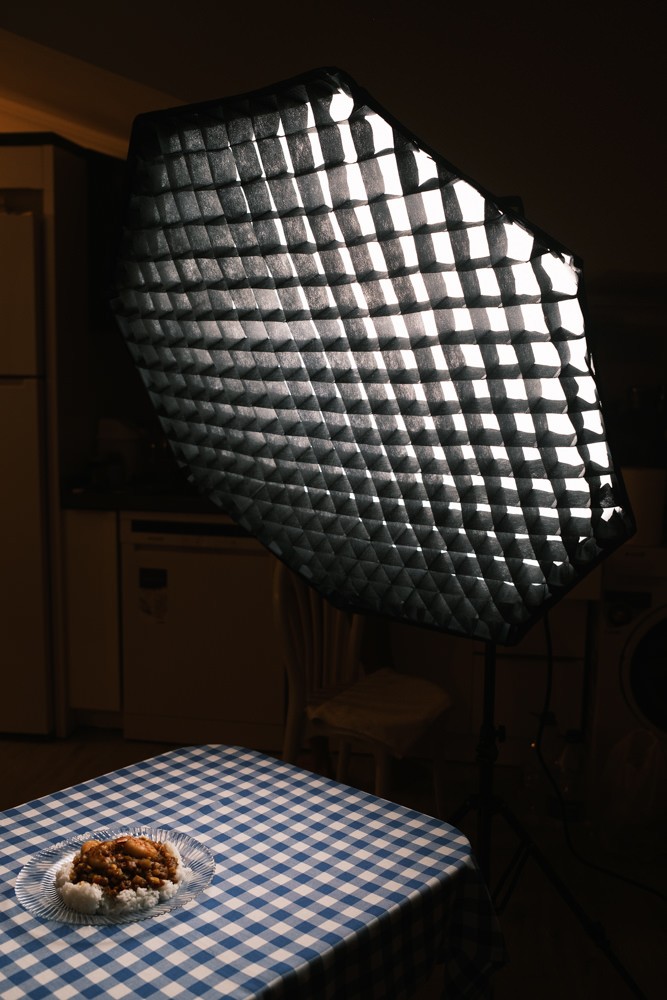
Closer For Soft Lighting
For a soft daytime scene, I place the much closer to the dish, usually about 1-2” away.
Level Side Lighting
The next to do is to choose your lighting angle. To create more even more shadows I place the light more level with the dish, which gives the look of daylight coming straight from the side. Think of having a window to the side of your kitchen table. When the sun is high overhead at like noon and not directly visible from the window, light is spread out and your kitchen will be lit in a more diffused way. As the sun goes lower and is visible looking directly out the window, the light is much stronger and more concentrated, creating more shadows.
If I place the light far away and directly level with my dish, the lighting will be quite dramatic. The higher up the softbox goes while still pointing down at the dish, the more evenly the dish will be lit.
Usually I would tell you to consider what mood you want to create with your shot ahead of time, but with a continuous light, you don’t need to. Once again, you can just adjust until you like what you see.
TL:DR Setup + Results
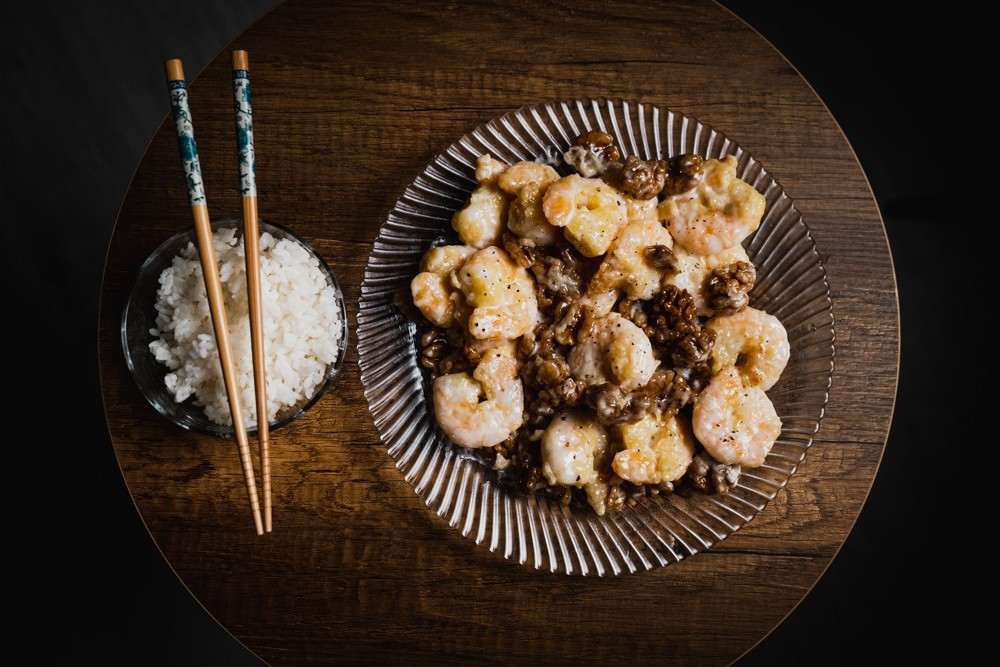
Soft, Diffused, Daytime Look. Keep the light close (about 1-2” away). Keep it higher up to create less shadows. Keep both diffusers on, but take off the grid.
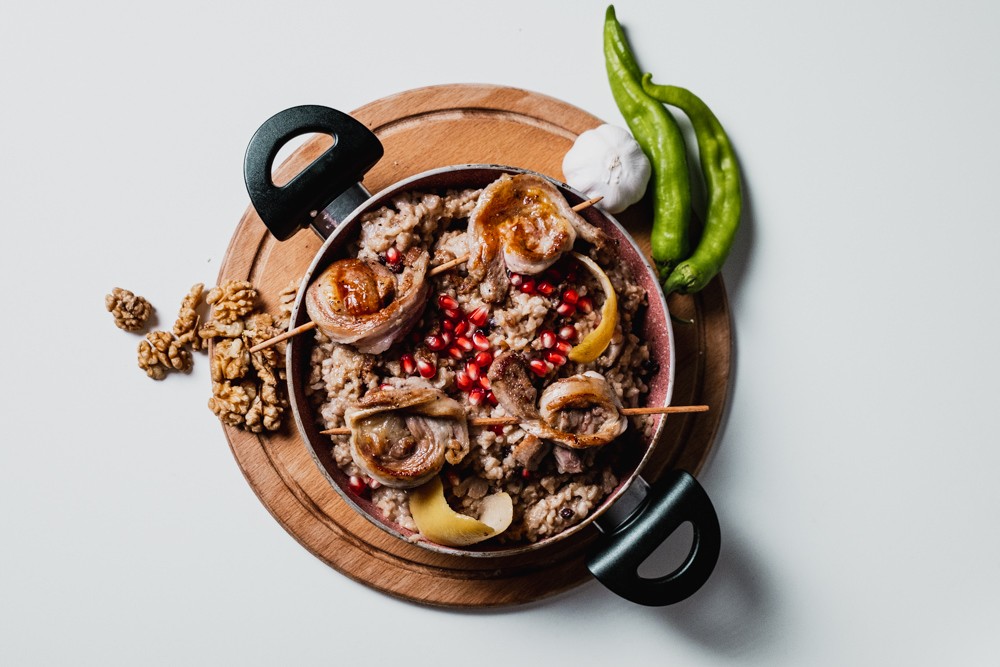
Dramatic, Less Diffused Artificial Light Look. Keep the light farther away (3-5”). Keep it lower and more level to the dish to create more shadows. Keep both diffusers on and keep the grid to control the light directly onto the dish.
I hope this has helped you get started with a simple but very versatile setup for under $200. Return here for more in my lighting series to come.
Updated on April 1, 2022