Loupedeck Vs Palette Gear Review: Faster Editing In Lightroom
Loupedeck Vs Palette Gear Review: Faster Editing In Lightroom
Loupedeck and Palette Gear are two completely different types of consoles that essentially aims to do one thing: help you edit a little faster in Adobe Lightroom. That’s a general statement, but if you’re here, you probably have a bit of an idea about the two devices. I have both and I’ve spent a few weeks with each to see which will find a more permanent place on my desk, so let’s get to it. First, a quick overview about each device.


Loupedeck Overview
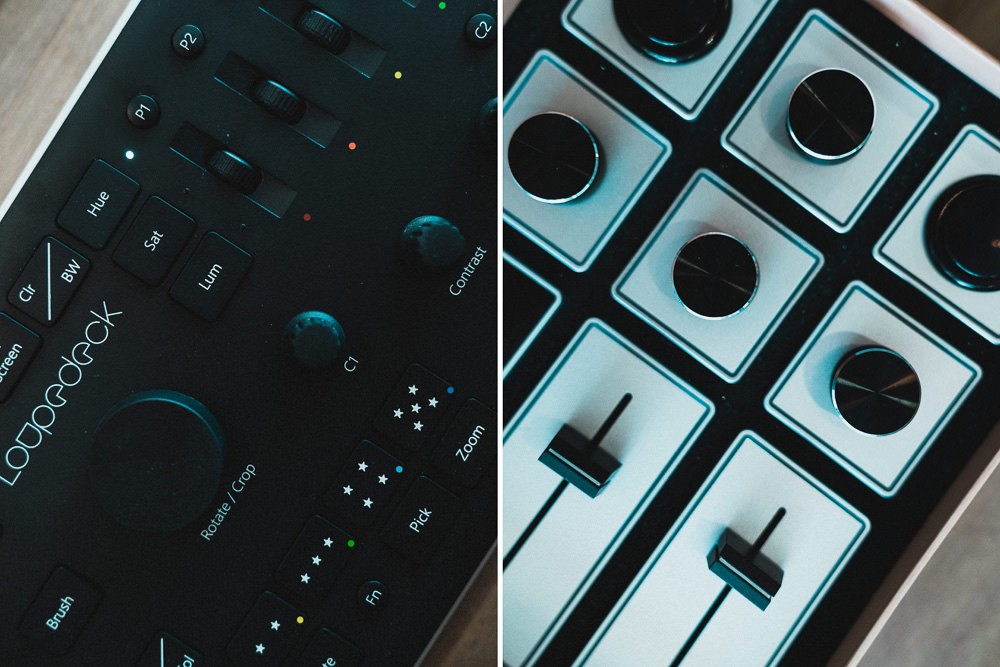
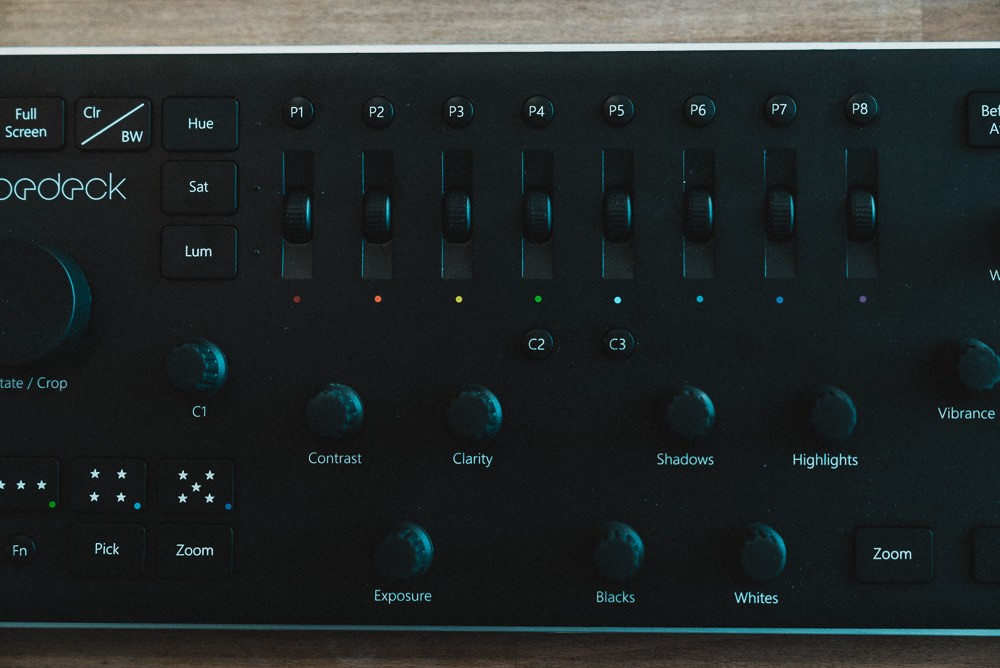
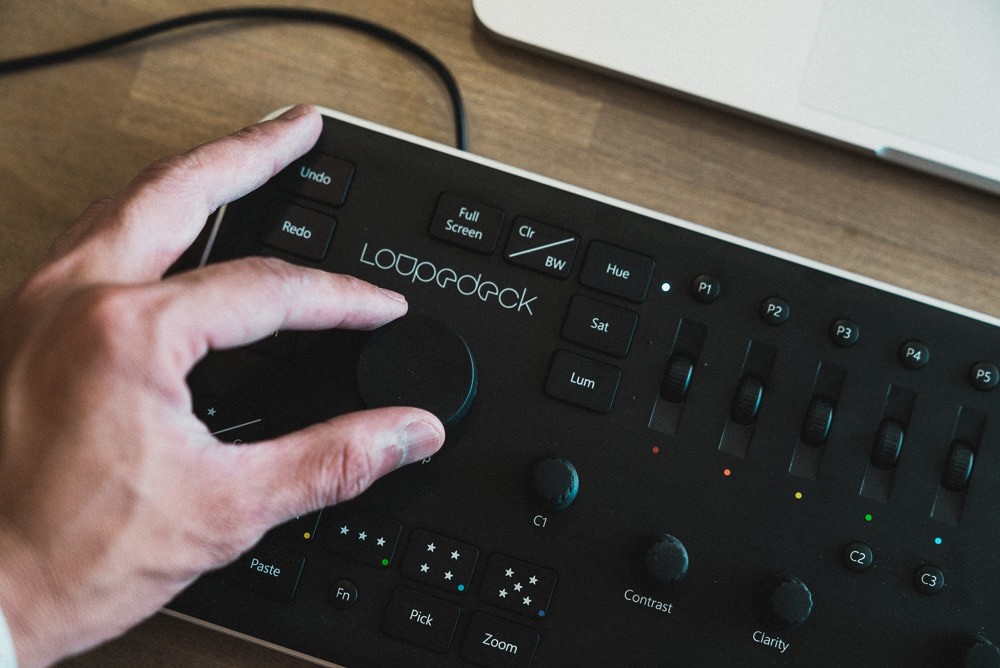
Loupedeck is a dedicated Lightroom keyboard. It takes most of the important functions in Lightroom and created buttons, dials, and wheels so you can access and make changes while relying less on your mouse and keyboard. I say less, because it doesn’t replace it completely, but it gets pretty close.
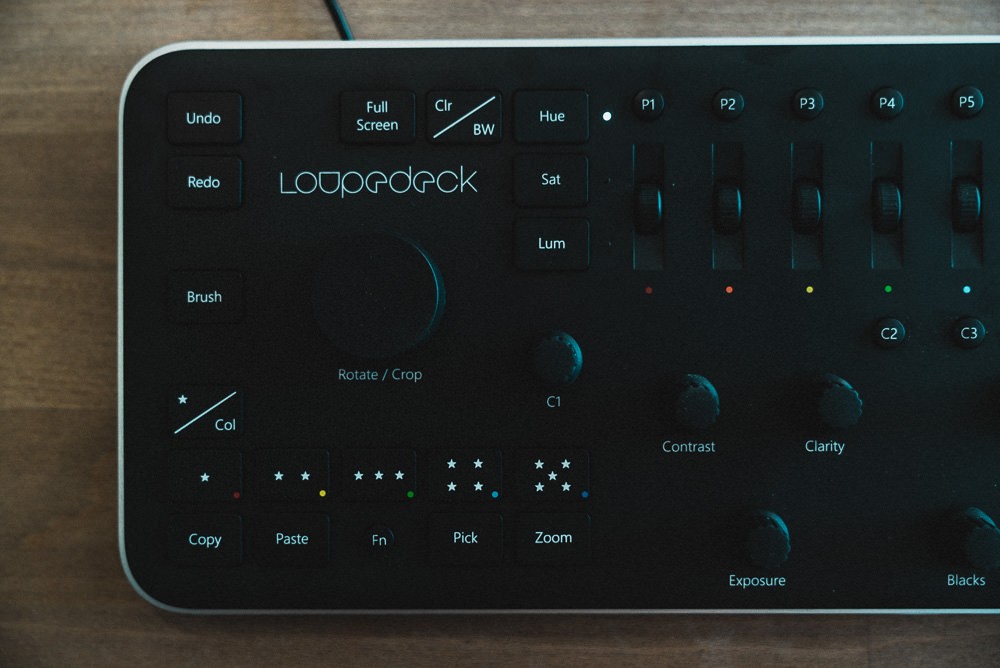
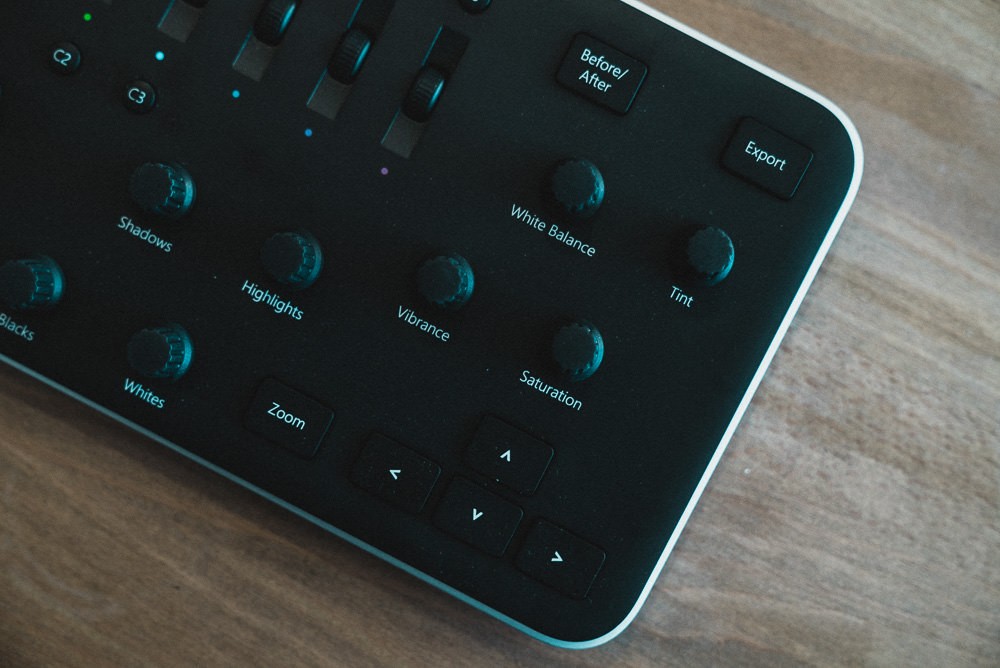
You’ll find dials for all the Treatment and Tone settings: White Balance, Exposure, Contrast, Shadows, Highlights Whites, Blacks, Clarity, Vibrance and Saturation. There are wheels and a toggle to control the Hue, Saturation and Luminance for all the colors. Buttons for rating for Stars or Color. And a lot of other dedicated and specific buttons like Copy and Paste, Zoom, and Export.
Essentially, it is hardware to control all your settings and theoretically, once you get used to it, should allow you to edit your photos without looking away. It’s made by a company in Finland, but you can get it in the US from here.

Palette Gear Overview
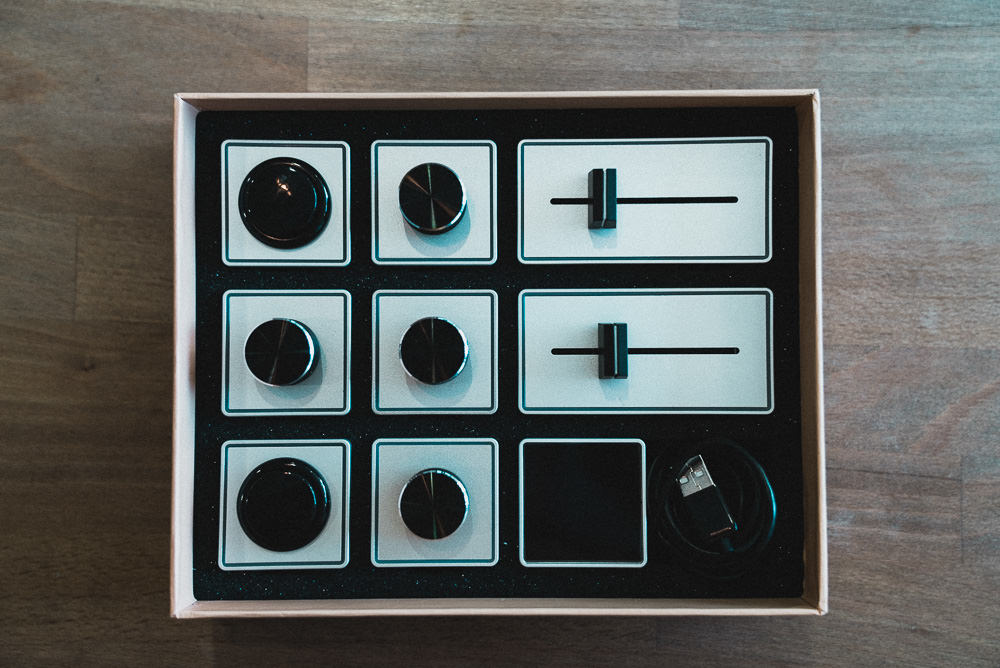
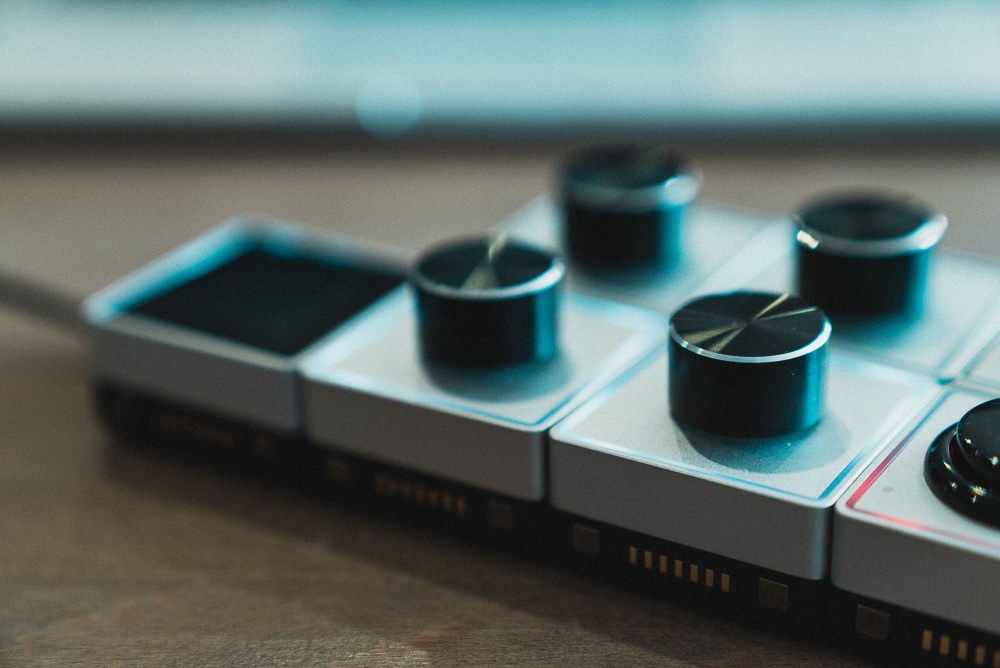
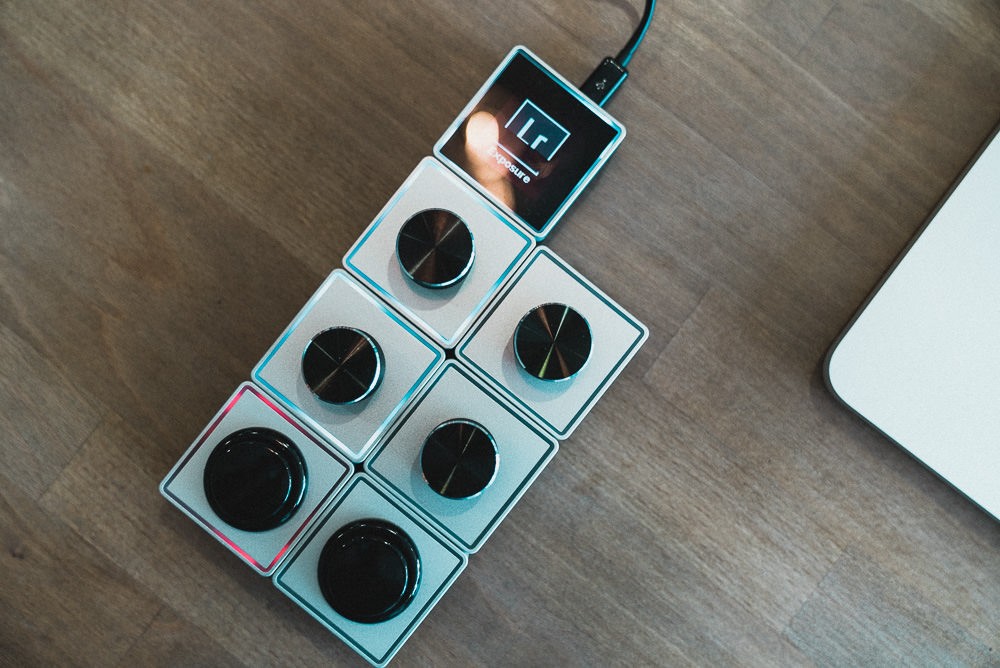
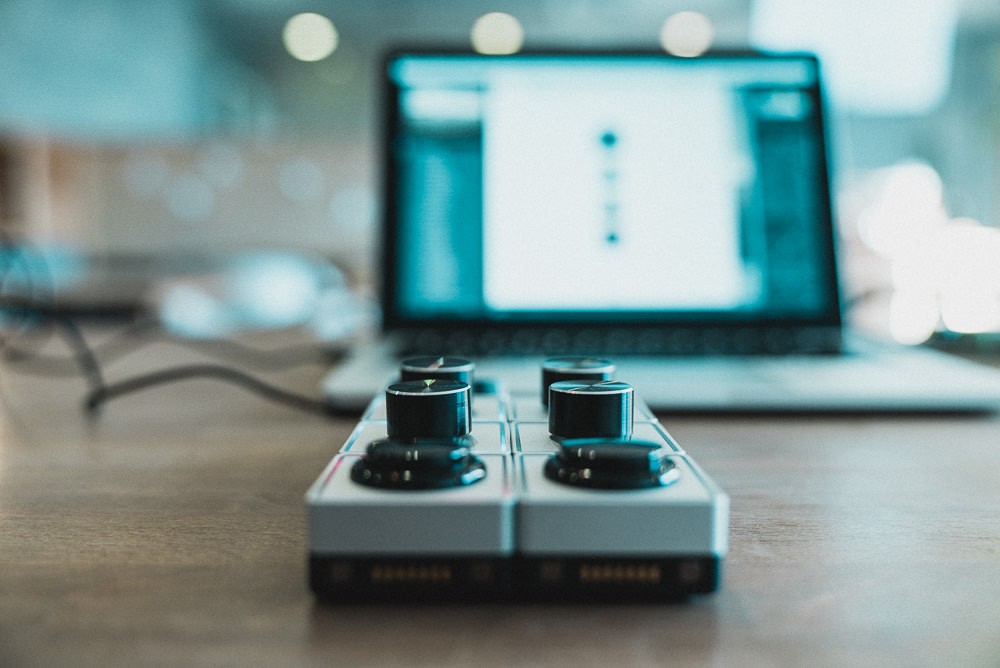
Palette Gear is a modular system of buttons, dials and sliders that are customizable to do different functions across different programs. The modules connect together magnetically like Legos and can be attached in any number of configurations. It’s extremely slick looking and seeing the modules snap together never gets old.
You can create your own kit by combining any number of “arcade-style button,” “multi-function dial,” or “high-sensitivity slider” along with an OLED core that connects to your computer via USB. The modules have an LED rim around the device that can change colors as well. While it’s customizable across a number of programs, I find it most useful for photo editing, hence why we are comparing it with the Loupedeck, which is a dedicated Lightroom console.
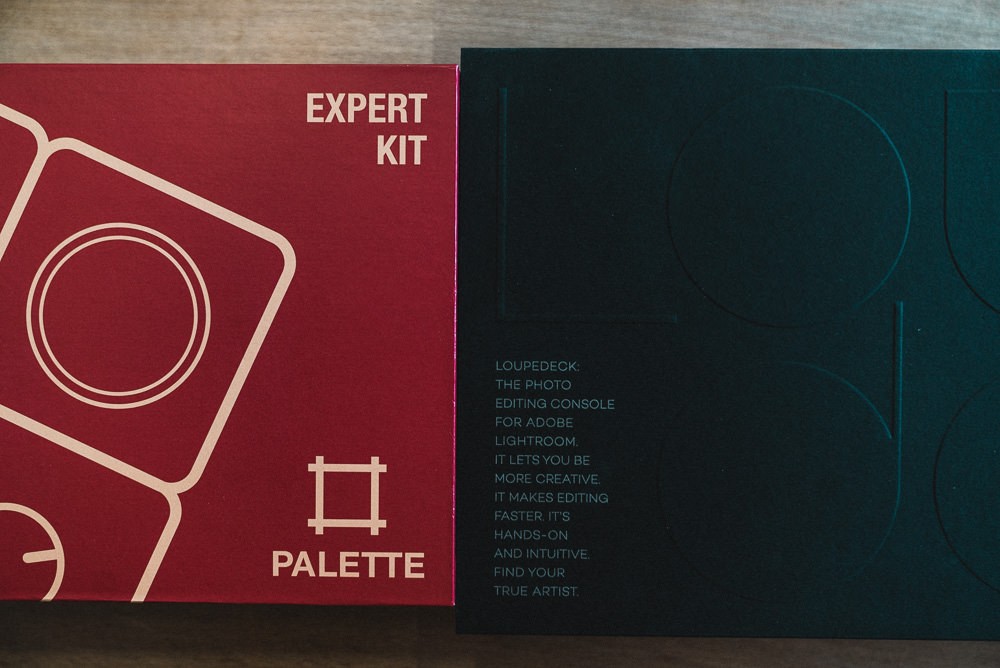
Palette offers 3 starter kits. I bought the Expert Kit that comes with the Core, 2 buttons, 3 dials, and 2 sliders. At the time of purchase, it also came with a free additional dial.
Real World Use With the Palette Gear
Most product companies have a nice website and demo video that promises to do everything that you would want the product to do. Both companies here are no exception to the rule. After a few weeks configuring, using, reconfiguring, and then reconfiguring some more, I can say that both devices generally do what they actually promise with a few caveats. Let’s start with the Palette Gear.

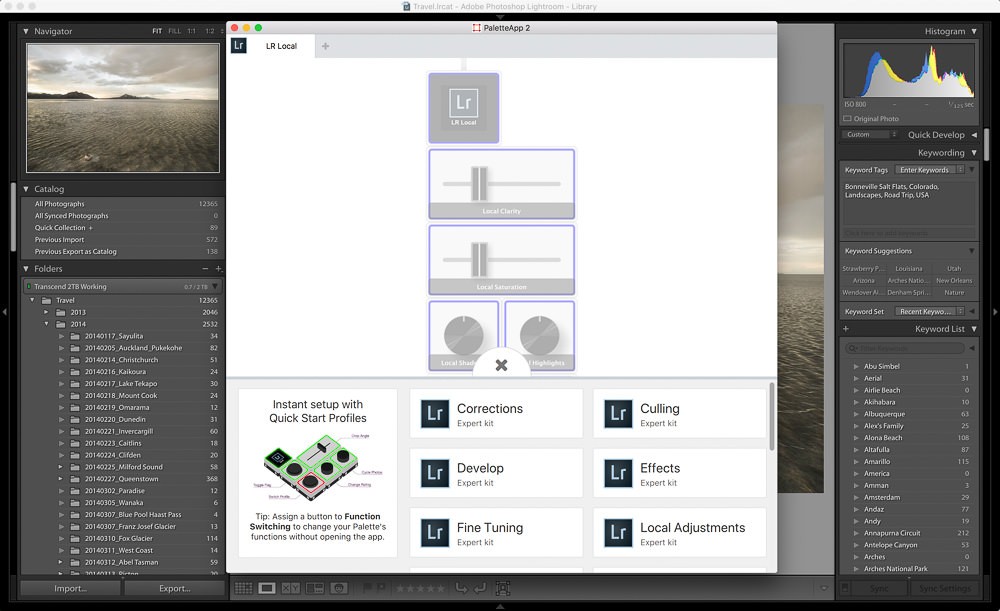
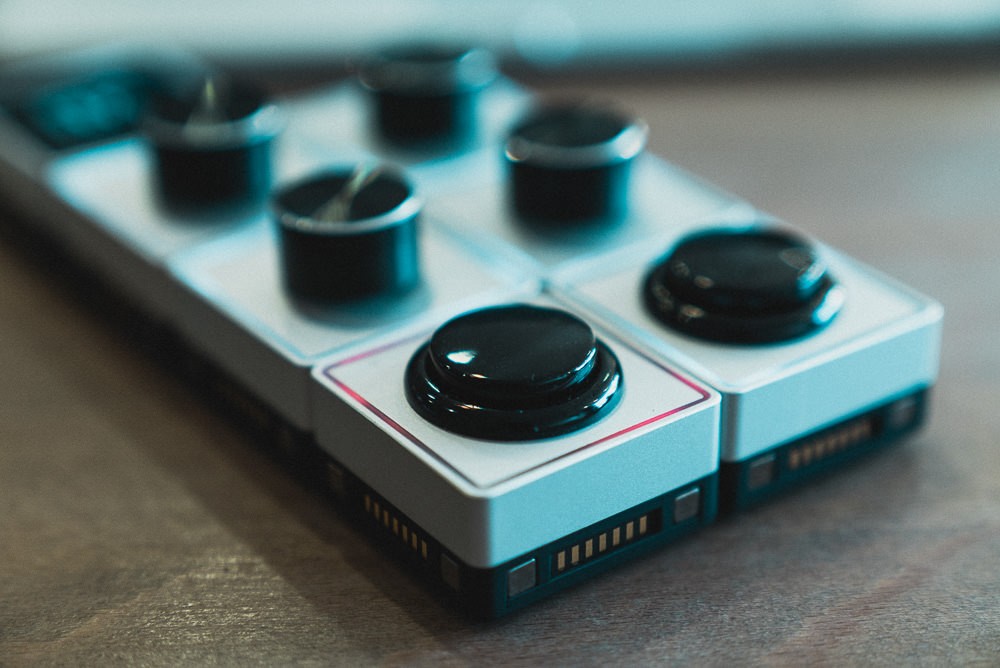
First PRO. It is beautiful. Oh man. It is beautiful and looks great on the desk. It’s definitely a conversation piece when people see it and everyone wants to play with it. After marveling at it for a few minutes, I downloaded and installed the software. It took me a few frustrating tries the first time, but it eventually worked. I connected the modules together and I was ready to go. NOTE: Make sure you connect the side with the pins to the adjoining module. It will light up when it’s connected properly.

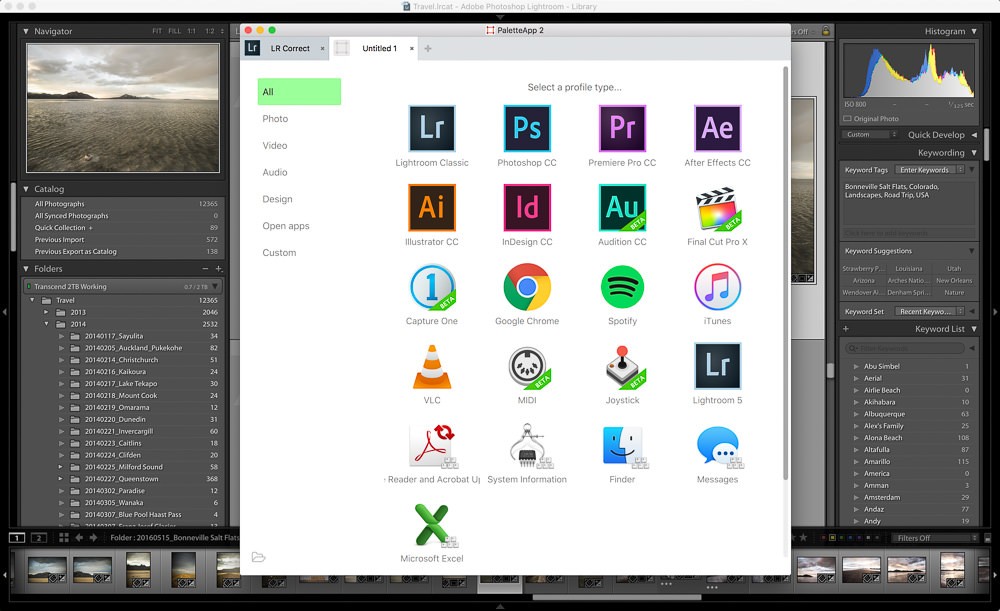
From there, I could choose a software and a pre-customized setting based my configuration. Out of the box, I didn’t find any of the configurations that useful, which is fine. It’s just to get you started. It took a good hour or so playing around with it before I came up with a series of “Profiles” that I can cycle between, covering a combination of different functions.
First CON. The high-sensitivity sliders feel nice, but do not work the way we’d all like. Let’s say I want to use it change Exposure and I move it the slider to the right +.50. When I go to the next photo, as soon as I make any movement to the slider, it will move the exposure to +.50 and go from there. It does not reset. When I’m making micro-adjustments from photo to photo, this just doesn’t work and actually costs me time to fix the exposure to where I need it to be.
Basically, I have no found any use for the sliders, except for Volume and Brightness.
The dials are great. They feel solid and you do not have the problem of the slider. You can adjust the sensitivity and it is responsive. Having 4 dials is great. In one “Profile”, I set it to change Temperature, Tint, Exposure, and Contrast. In another, it controls Shadows, Highlights, Whites and Blacks.
The two buttons are used to cycle forwards and backwards between the Profiles. This setting stays the same across all the Profiles so you can’t really use it for anything else if it’s set for this.
My Workflow With The Palette Gear
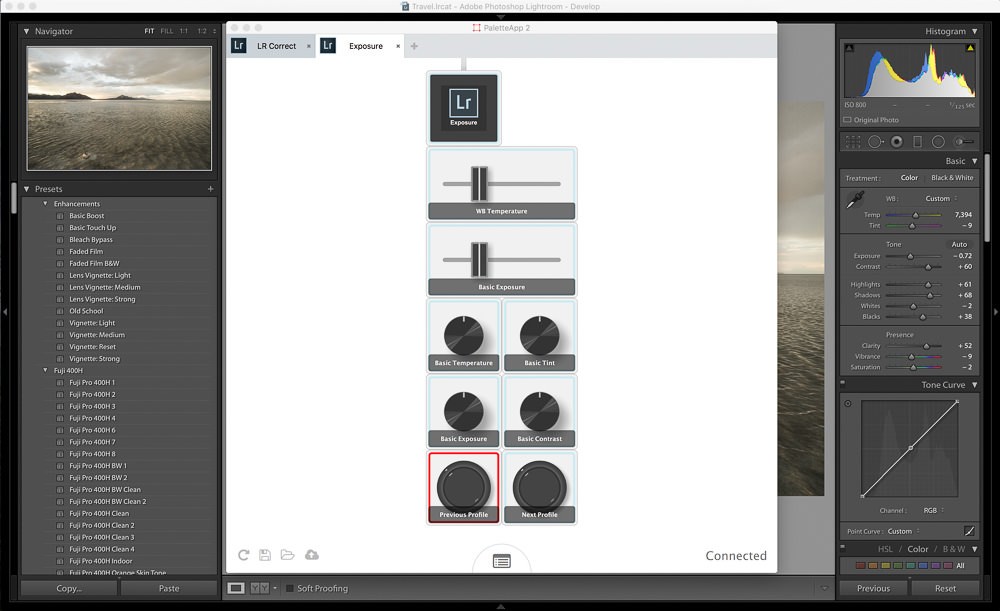
I wanted to get the Palette Gear to help with my photo AND video editing. It was quickly apparent that, as of now, it’s pretty much useless in Premiere and Final Cut Pro X. Your mileage may vary here. The functions you can assign to the modules are limited and does not save me any time at all. For Lightroom, I tried to create a bunch of Profiles to cycle through to control as many of the settings as possible. I couldn’t rely on the sliders, so basically it was just the 4 dials and the two buttons to cycle through each set of functions.
I tried A LOT of different configurations. After “getting used” to this, I realized that I WASN’T SAVING ANY TIME AT ALL. I had to remember what each dial did and I’d find myself just going back to the mouse to control the settings themselves.
My More Successful Workflow With The Palette Gear
And then I figured it out. When I begin to edit a set of photos, I start with one of my custom presets or spend about a minute or so to make all the necessary major adjustments to one photo. I then apply those settings to a batch of photos and then go through and make fine tune adjustments. Specifically, Temperature/Tint and Exposure.
I set one of the buttons to Reject so I can cycle through and make my selections of photos to keep and reject. I could use the “X” key on the keyboard, but it’s so much more fun to press an arcade button over and over, instead of a keyboard key. If I had another button, I would configure one for Forward and one for Back and then the third for Reject. That would allow me to quickly go through thousands of photos in the Library module before going into the Develop module to make my edits. So basically problem solved. Sort of right?
Then I saw the Loupedeck. Unlike the Palette Gear, this was made specifically for Lightroom and appeared to have almost all the settings mapped out on a keyboard. I still wanted to see if I can save more time editing.
Real World Use Of The Loupedeck
I am a fan when companies spend the time on their packaging. Scandinavians are known for their minimalist design and the Loupedeck came in a slick black box with an embossed logo sleeve. Slide the box out of its sleeve and it’s just the logo in silver.
The console itself is made of plastic. It is well constructed, but I would have preferred a metal or aluminum finish. Being used to the keys on a Macbook, the buttons on the Loupedeck don’t have quite the dampened feel. Still, it is a nice piece of console, and like the Palette Gear, I wouldn’t mind having it on my desk.
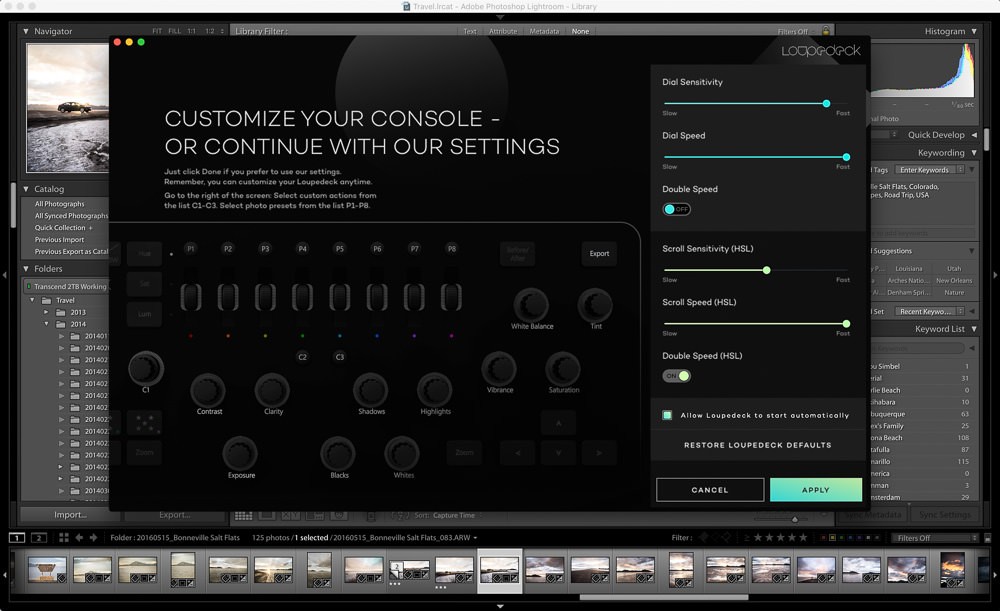
Setting up the Loupedeck was a little easier than the Palette Gear and it is almost ready to use out of the box. Still, I spent a few minutes making some initial configuration in the settings like playing with the wheel and scroller sensitivity. This area would take some time to figure out over the next week.
C2 by default is configured to go toggle between the Library and Develop module, which is nice. From there, I can make my edits. It took a few hours of editing, but by the 3rd day, I no longer had to look down at the dials to figure out what I was adjusting. Pressing down on any of the dial resets it, so that’s nice if I want to quickly start over. Getting the sensitivity right was and is somewhat still a process of trial and error.
This is something that I think can still use some fine-tuning.
I’m not a fan of accelerated sensitivity on any dials. When I turn a dial a certain number of degrees, I prefer it to equate to a certain adjustment each and every time, regardless of how slow or fast I move it. Perhaps I haven’t quite figured it out here yet, but moving the dial faster will make it move more. As with anything, once you get used to it, it’s no longer a problem, but you WILL need to get used to it.
Configurations Options
From the Loupedeck interface, you can configure 12 of the buttons and dials. P1-P8 allows you to choose from develop presets. The C1 dial can be customized to change settings that require a slider and C2 and C3 are buttons that can be customized to toggle tools or switch between modules. I changed C1 to adjust noise, left C2 to toggle between the Library/Develop module, and changed C3 to toggle the Spot Removal Tool. I set P1-P8 to apply 8 of my most used Presets.
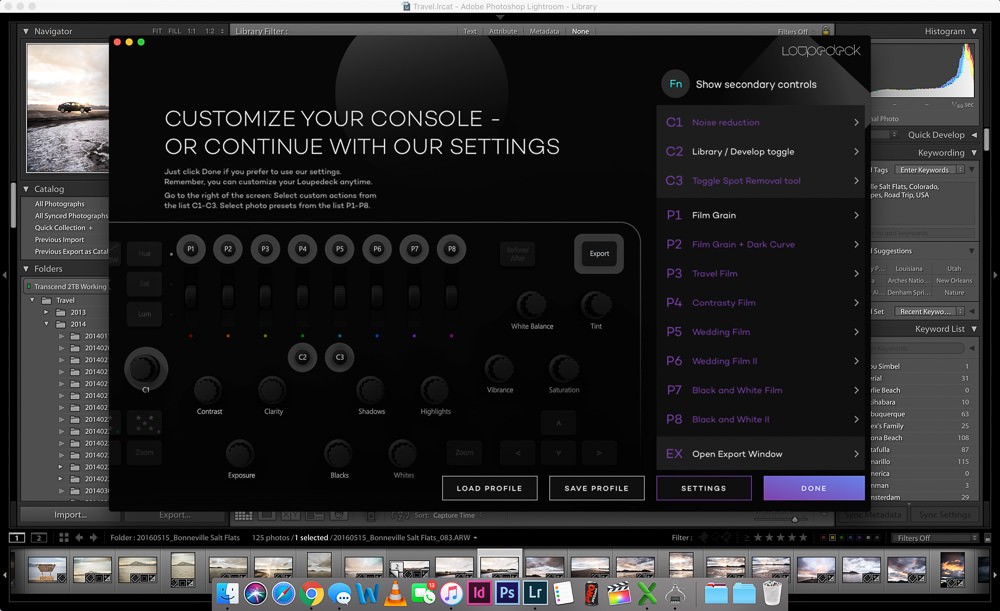
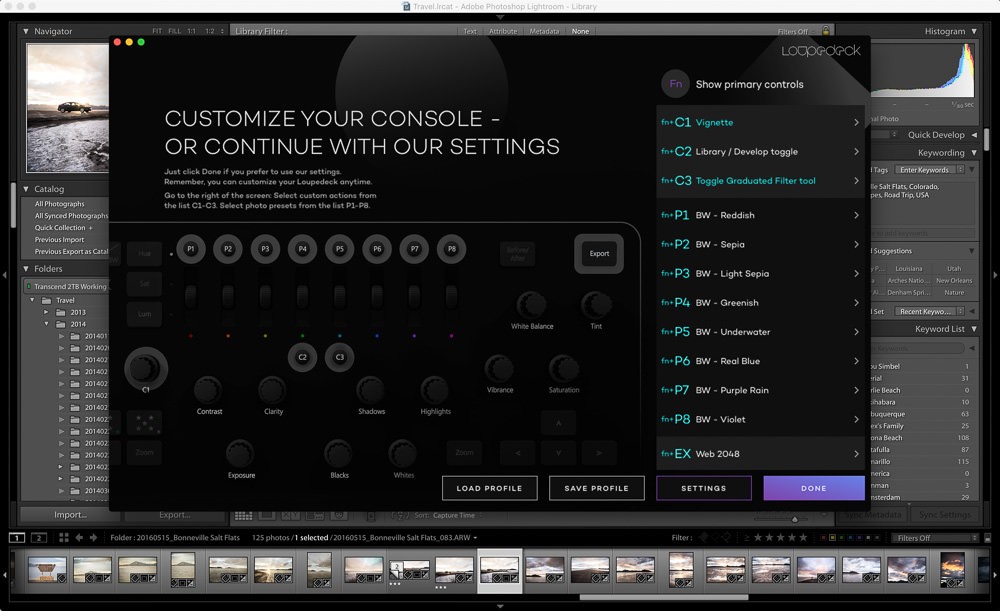
You can apply a second set of customization with the Function (FN) button.
I personally would like to be able to change a couple of other buttons, specifically the PICK button, since my workflow revolves around rejecting photos rather than picking them. The FN + PICK button REJECTS a photo. So that works, but it would be nice if I didn’t have to push down two buttons to reject each photo.
The Rotate/Crop dial/button is nice and big. I’ve found that if you hold down the Function button while rotate, it will move in smaller increments.
My Workflow With The Loupedeck
Off the bat, I found that I could get a lot more done as far as selection and editing than the Palette Gear. I still had to use my mouse and keyboard for certain things like brushes, graduated filters, spot removals, tone curves, lens correction and transformations, but overall, 80% of my editing can be done from the Loupedeck interface. 90% if I preconfigure some of those adjustments as Presets as set it to one of the P1-P8 buttons
I always start my edit by rejecting photos that I don’t need. If shots jump out, I usually flag it as Yellow, which can easily be done on the using the console. Having the keys Up, Down, Left, Right keys are useful for going back and forth between shots while doing this reject/flagging step.
From there, I click C2 to go into the Develop module. I usually apply one of my Presets if it’s applicable. At the very least, I apply a Preset for grain and tone curve adjustment that I use for almost all of my photos. I then make my White Balance, Exposure, Contrast, Shadows, Highlights, Whites, Blacks, Clarity and Vibrance adjustments, which are all dedicated dials on the Loupedeck.
I do the same with the scroll wheels for the color adjustments toggling between Hue, Saturation and Luminance with my left hand and adjustment the wheels with my right. Then I apply the settings from the photo to a batch of applicable photos. This is where I have to move back to the keyboard for a second.
There is a Copy and Paste function, but it’s intended for applying the settings from one photo to another. I usually apply to a batch by selecting the batch of photos. I haven’t found a way to select a bunch of photos on the Loupedeck to do this.
Finally, I go through each photo and make fine-tune adjustments. This is where the Loupedeck shines. I can quickly adjust the Exposure or White Balance of each photo and move on. This saves me about a few seconds a photo, so that’s a bit of time saved across a few hundred photos. Voila. Exactly what I wanted when I saw the Loupedeck.
BUT.
Because there’s always a but when it comes to any first generation product.
Responsiveness. Though the device is connected via USB, I sometimes found the responsiveness a little slower than when using my keyboard or mouse. When I move to the next photo and make a change, it might take a micro second before I see the change. Initially, it was a bit disconcerting, but you get used to it after a few use. Whether this can be a software fix, I’m not sure.
Is this a dealbreaker? Absolutely not. It’s something worth pointing out, but overall, my workflow is much faster during the selection process and the fine-tuning process.
What’d I’d Like To See In Future Update/Versions
For the Palette Gear, I’d first like to see a mechanized version of the Slider that can be reset somehow, or not affect the setting of the next photo. Software wise, I’d like to see more options for video editing.
For the Loupedeck, I’d like to see the responsiveness improved and make more of the buttons configurable. I’d like to be able to change have more choices for P1-P8 beyond just Presets, and likewise for the C1 dial and the C2 and C3 buttons.
For both, I’d like to see a Bluetooth version. It’s 2018. We should be done with wires.
Which One Should You Get?
That’s the big question isn’t it and it comes down to a few things. What will YOU be using it for?
The Palette is NOT Lightroom specific. It can be customized for other software, like Photoshop, Indesign, Capture One and even for controlling applications like Spotify and VLC. It’s also really pretty to just look at and fun to play with if you miss your Legos as an adult. I also use it to control iTunes and to open new windows in Chrome, because why not.
The Loupedeck is ONLY for Lightroom, but it does that very well and much better than the Palette Gear. There’s something to be said for a dedicated piece of hardware rather than a jack of all trades that is a halfway solution.
At $300 for the Expert Kit here and $259 for the Loupedeck here, they are both not exactly cheap, but from an editor point of view, that is a very small price to pay to save time every time you sit down to edit a batch of photos. For wedding and event photographers, this is a no brainer. Bottomline, I recommend the Loupedeck if you are a heavy Lightroom user. If you want something to just speed along a couple of steps in a number of different applications, the Palette Gear could be for you.
Updated on May 14, 2018


[…] About the author: Kien Lam is an international photographer and filmmaker based in San Francisco. The opinions expressed in this article are solely those of the author. He runs whereandwander.com and believes in living for those moments that make the best stories, told or untold. He is working through his bucket list and wants to help others do the same. This article was also published here. […]
[…] About the author: Kien Lam is an international photographer and filmmaker based in San Francisco. The opinions expressed in this article are solely those of the author. He runs whereandwander.com and believes in living for those moments that make the best stories, told or untold. He is working through his bucket list and wants to help others do the same. This article was also published here. […]
[…] About the author: Kien Lam is an international photographer and filmmaker based in San Francisco. The opinions expressed in this article are solely those of the author. He runs whereandwander.com and believes in living for those moments that make the best stories, told or untold. He is working through his bucket list and wants to help others do the same. This article was also published here. […]
[…] About the author: Kien Lam is an international photographer and filmmaker based in San Francisco. The opinions expressed in this article are solely those of the author. He runs whereandwander.com and believes in living for those moments that make the best stories, told or untold. He is working through his bucket list and wants to help others do the same. This article was also published here. […]
[…] About the author: Kien Lam is an international photographer and filmmaker based in San Francisco. The opinions expressed in this article are solely those of the author. He runs whereandwander.com and believes in living for those moments that make the best stories, told or untold. He is working through his bucket list and wants to help others do the same. This article was also published here. […]
[…] You can follow Kien on Instagram, Twitter, and his Facebook page. This article was also published here and shared with […]
[…] About the author: Kien Lam is an international photographer and filmmaker based in San Francisco. The opinions expressed in this article are solely those of the author. He runs whereandwander.com and believes in living for those moments that make the best stories, told or untold. He is working through his bucket list and wants to help others do the same. This article was also published here. […]