TourBox For Final Cut Pro X: I Edited Faster Than Ever Without A Keyboard
TourBox For Final Cut Pro X: I Edited Faster Than Ever Without A Keyboard


2020 has been an extraordinary year. I started off the new decade in Turkey before traveling across Europe and finishing with the most spectacular winter road trip in Iceland. Right after I returned home to Los Angeles, the world went into lockdown. During this “Great Pause”, with any further travel assignments indefinitely suspended, I found myself with a lot of extra time to dive into my archive of content to finally edit travel films that have been put on the back burner.
UPDATE: There is a new TourBox Elite console that’s out. It’s everything the original tourbox is and more..but best of all, it’s completely wireless.
You Are Only As Fast As Your Shortcuts
As a film editor, you learn early on just how essential keyboard shortcuts are to the process. It’s the type of muscle memory that saves you a lot of time from having to hunt through layers of menus and tiny icons. So, what happens when you try to edit an entire project without your keyboard?
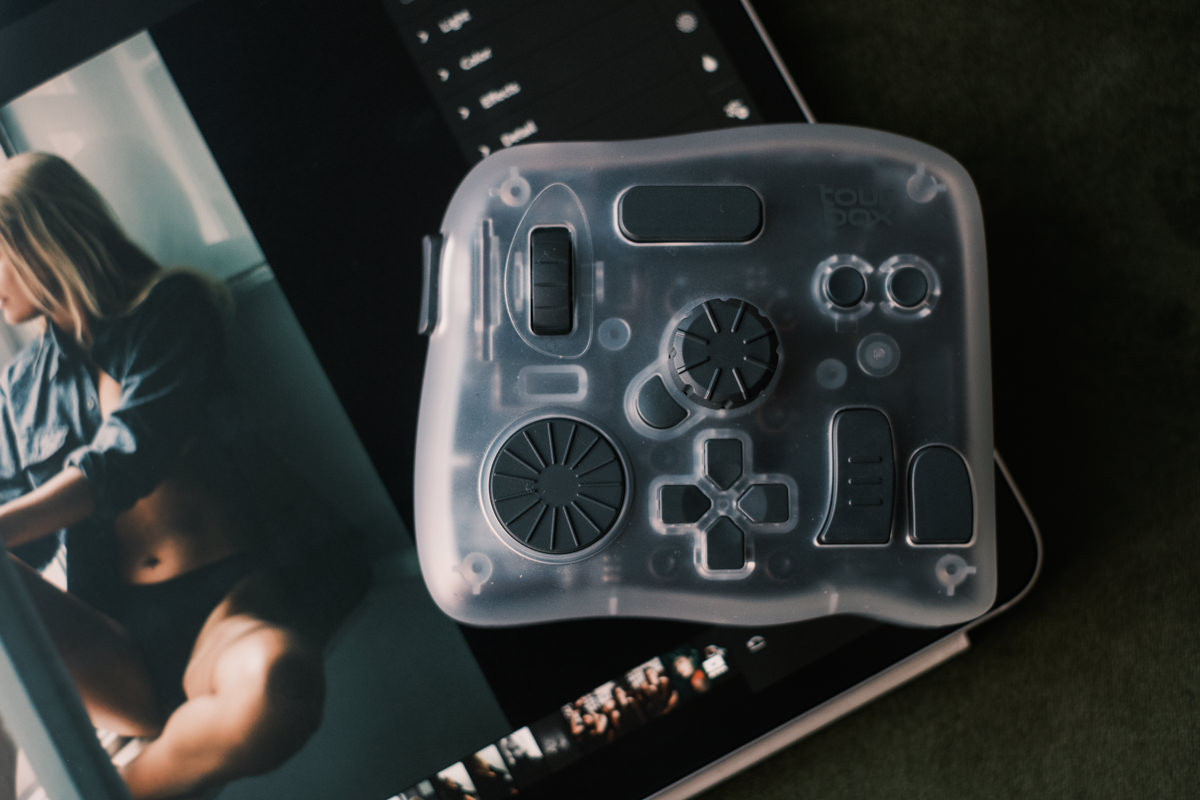
Having tested out and configured my TourBox controller console to speed up my workflow in Lightroom and Photoshop, I knew it could do something similar for Final Cut Pro X, but similar devices I’ve used in the past have left me wanting. Much to my surprise and delight, after an hour of customizing and testing, I was able to map the TourBox to trigger all my most frequently used shortcuts.
This made me think. Could I edit an entire short film WITHOUT my keyboard, using only the TourBox and my mouse? And if so, would it be something I would do given the choice.
The answer to both turned out to be a resounding YES, but with a couple of obvious and logical caveats – you still need a keyboard to type words and numbers into a title, for example. I’ll take you through my process and why I see the TourBox as an essential time-saving tool that will sit on my desk at home and taken with me when I’m editing on the road.
While I edit mostly in FCP X, you can do the same in Adobe Premiere AND WITH almost any other program on your computer.
Can You Edit A Film Without A Keyboard?
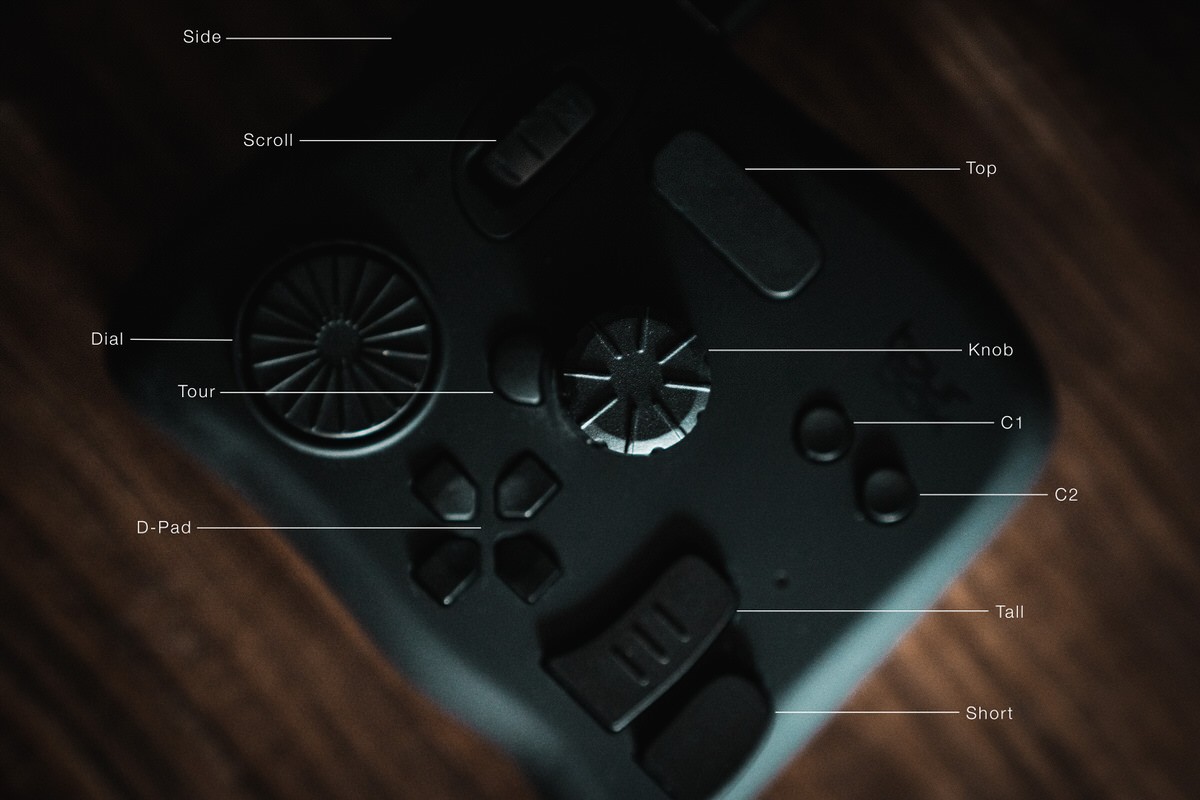
Below is a list of basically ALL the keyboard shortcuts I use in FCP X and the rough order of how often I use the them. It’s a long list and despite the 14 wheels, dials, knobs, and buttons on the TourBox, I had my reservations that I could configure them all to the device in an intuitive way. And yet, it was possible, after a few trial and error reconfigurations.
A – Select (Arrow) Tool
CMD + + – Zoom In
CMD + – – Zoom Out
B – Blade Tool
I – Set In Point
O – Set Out Point
W – Insert Into Primary Timeline
CMD + Z – Undo
Shift + CMD + Z – Redo
Enter/Space – Play/Pause
Backspace – Delete
V – Enable/Disable Clip
Shift + B – Set Variable Speed Ramp (Used to create variable speed in a clip without blading)
CMD + S – Auto Retime Clip (Used to automatically retime 60 fps to 24 fps timeline)
CMD + Shift + S – Set Audio Volume to 0
CMD + C – Copy
CMD + V – Paste
Shift + CMD + V – Paste Attributes
Alt + K – Insert Keyframe
M – Mark
Right – Go To Next Frame
Left – Go To Previous Frame
CMD + Shift + F – Play in Fullscreen
Esc – Exit Fullscreen
Q – Append To Primary Timeline
Alt + CMD + Up – Lift From Primary Timeline
CMD + Left – Move To Previous Clip
CMD + Right – Move To Next Clip
Up – Go To Next Snap Point
Down – Go To Previous Snap Point
CMD + Shift + CTRL + 8 – Reset Audio Volume
My Start To Finish Workflow
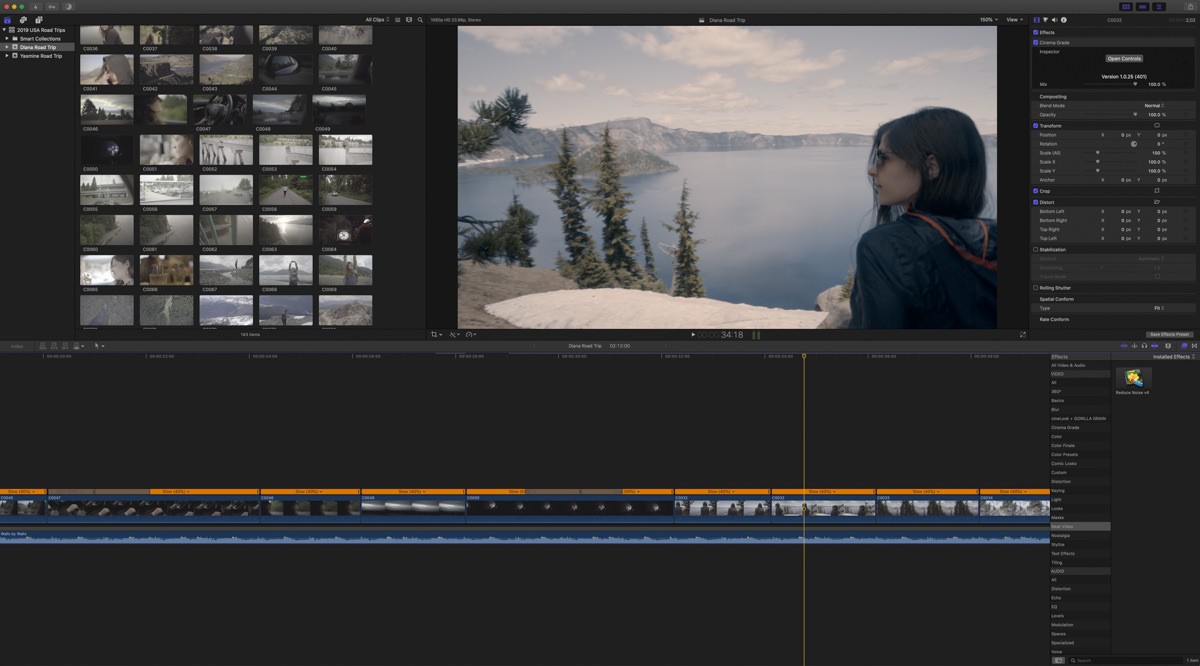
When the configuration was done, I began working on a film about my road trip from San Francisco to Vancouver called “Coast.” It would incorporate most of the general techniques I use in my travel films like slow motion, variable speed ramping, beat synchronization, and color grading.
My workflow for the film looked like this.
- Find music. I use Artlist to license royalty free music for most of my projects. They have a great selection and a reasonable annual subscription. You also get 2 extra free months when signing up with my referral link.
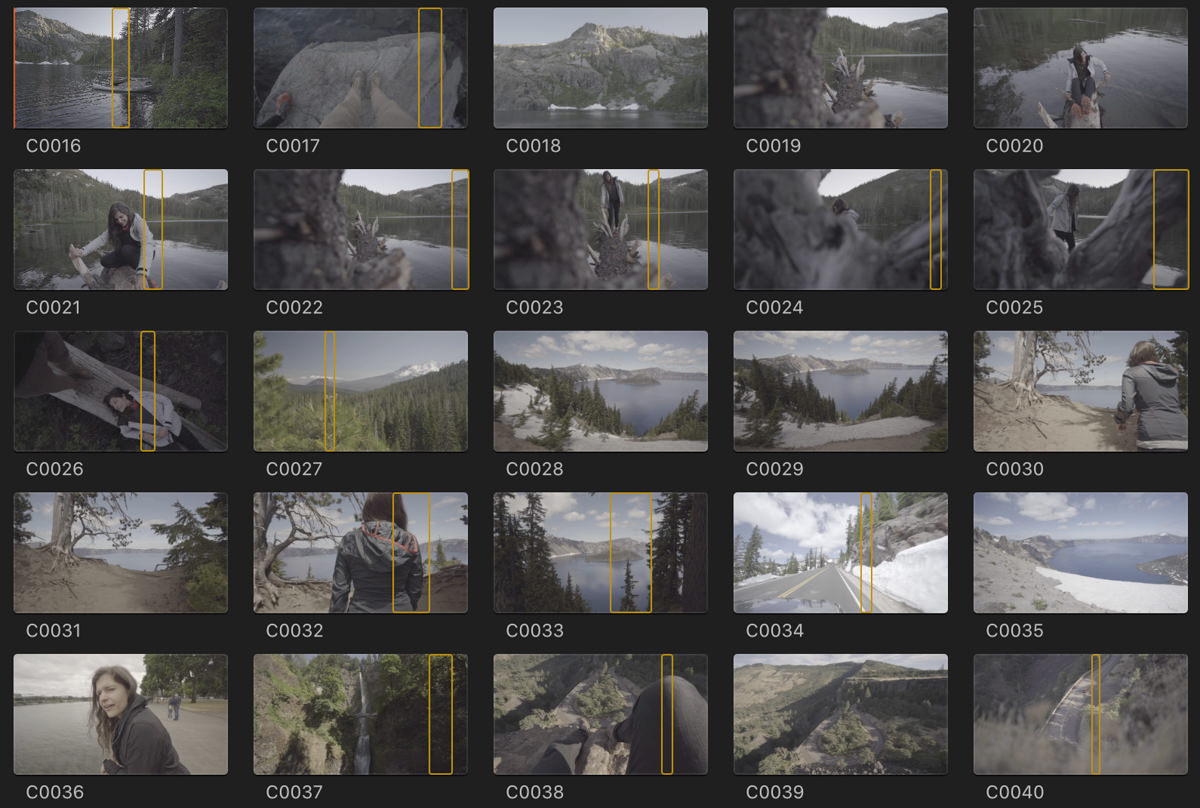
- Skim through my clips, select my rough In and Out points and mark that segment as “Favorite”. I’ll do this if there’s a lot of footage to sort through and the clips are longer in length, but sometimes I also just go through the clips and favorite the entire clip and skim through them later when I’m editing. It depends on whether I want to front load the time spent getting “acquainted” with my available footage.
- Mark the beats. I like to work with the beats and lyrics in the song, so I’ll go through and do a rough marking of where the major beats fall, using the M shortcut. It’s basically like listening to a song and tapping along to the major beats.
- Sorting through my “Favorite” clips and and dropping it into my Primary timeline.
- Slow down clips to see if I want to use slow motion. For projects where I’m unsure of how the final edit will look, I shoot 60 fps to give me the option of slow motion and more range with speed ramping. I use the Variable Speed Ramping tool here and have a shortcut to automatically convert 60 fps clips to 24 fps and get that slow motion. After the new slowed down clip gets extended in the timeline, I can see how much of the shot I can fit before the next beat or two.
- Trim the clips using the Zoom and Blade tool and getting it to flow with the music.
- Add Effects and Transitions. This step varies the most from project to project where transitions can get complicated, but for the most part, I keep it simple and try to use the composition and content of the shots to create natural transitions.
- Color Grade and Noise Reduction. I grade directly in FCP X using a combination of their built in Color tools along with the Cinema Grade plug-in. If the clip was shot with a higher ISO, I might de-noise it before grading.
- Add Titles. This was that caveat I mentioned before. There’s no getting around the keyboard for this one. I need numbers and letters for my titles.
- Review. I put this step at the end, but I regularly watch and rewatch sections of the film as I’m creating them. It’s important for me to make sure everything flows and makes sense. As new segments are created and the film gets near completion, I might mark out certain sections and swap out clips for the overall narrative to work. I’m zooming in and out, disabling clips, and dropping footage onto a secondary timeline often during this process.
The Amount Of Time I Spend Zooming
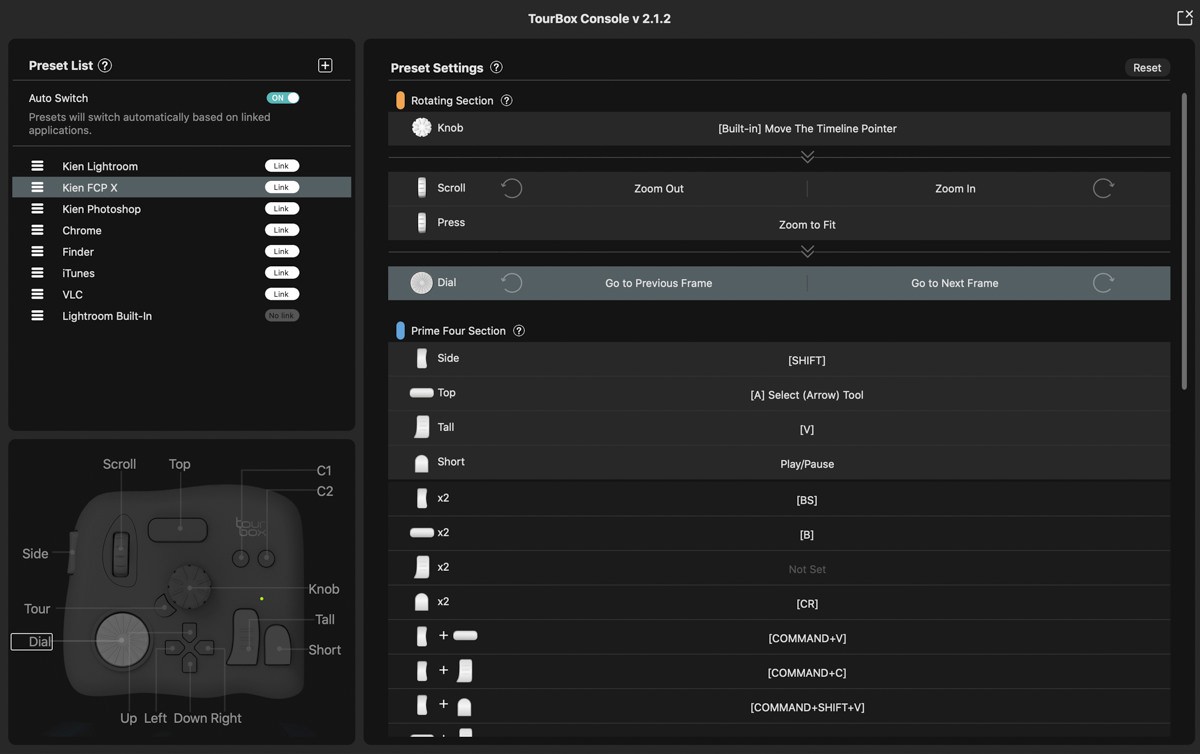
During the edit, I was constantly scrubbing back and forth through a timeline to make sure a clip is precisely where it needs to be. The Dial and Knob allowed me to quickly scrub back and forth without having to move the mouse.
This process also required a lot of zooming in and out and trimming so I can precisely edit down to an individual frame. Prior to the TourBox, that meant constantly taking my right hand off the mouse to press CMD and + over and over to zoom and then CMD and – over and over to zoom out. I mapped these two functions to the Scroll Wheel. Now I was just scrolling up and down with my left hand and kept my right hand on the mouse. I hadn’t realized how often I had to zoom in and out of the browser, the viewer and the timeline.
That shortcut on its own saved me enough time to justify giving the TourBox a spot my desk.
Adding Footage
Whether I’m setting the In and Out point while I’m marking favorites or to drop directly into the timeline, it’s another keystroke that I do with my right hand, taking it off the mouse. With the TourBox, I used the left and right arrow to set the In and Out points, and the down arrow to insert the clip into the primary timeline. If I didn’t like where I placed that clip, a double click of Side button deleted it, or I could click the C1 button to Undo.
For this film, most of my clips were short, so I quickly scrubbed through them to see what I had shot and skipped the favoriting step.
I also turned off all the audio to the clips. This was now done by holding down the Top button and turning the Knob to the left to reduce the volume to 0 dB.
Made a mistake? I could turn the Knob back to the right to reset it, or press C1 to Undo. Changed my mind again? C2 is set to Redo. Once again, neither one of my hands had to leave the TourBox or the mouse during this step.
All of these things can be done on a keyboard with a few more keystrokes. It’s not a big deal, but it was so much faster on the TourBox without having to move back and forth from the mouse.
Retiming
After placing most clips, I automatically retime them to slow motion to see how it looks and how much space it takes up on the timeline. Pressing the Top button and left arrow together automatically does this. To do a speed ramp transition from slow motion and speed ahead to another slow motion section, I set my transition points by pressing the Top button and right arrow and use the mouse to speed up the section in between.
I zoomed in and out often to get a precise point to blade used the scroll wheel a lot for this. To play, I press the Short button. Once again, all of this is accomplished without moving my hand since all the buttons and wheels are so close together. Ergonomically, it’s much more comfortable for my wrist over a several hour editing session.
Transitions and Color Grading
From a technical perspective, this was one of my more simple films. I mostly synced to the beats and retimed a couple of clips so the movements in the footage like the tapping of a finger or a flickering of a light would match up with the in-between beats. This part was done by using the Zoom, Blade, and Retiming tools to set everything just right. There wasn’t much I did differently from a color grading perspective with the TourBox since my Cinema Grade plug-in has a unique way of color grading by selecting what you want to adjust and sliding the mouse up and down.

Once I finished adding an effect and color grade/LUT to a clip, I copied all the attributes (Top + Tall button) and used the Side button (Shift) to batch select all the clips that I wanted to paste the attributes to (Top + Short button) and doubled clicked the Top button to apply.
Why Saving A Few Seconds At A Time Matters
Other than the zoom in and out scroll feature (super useful), for a seasoned editor who has his shortcuts memorized, each move done on the TourBox will only save you a second or two each. So why am I so impressed?
Overall, these few seconds add up over the course of a long multi day edit, but more importantly, your hand and fingers do not have to move as much and you don’t need to hunt for different shortcut combinations all the time, especially the more complicated ones that require 3 or 4 keys. Ergonomically, you are easing the strain on your fingers and wrist, which is a real issue, if you are at it all day long.
During the review process, I heavily used the scroll wheel and knob to scrub the timeline and zoom in and out on the footage. I also moved clips around so the Copy (Side + Tall button) and Paste (Side + Top button) came in handle along with the Disable tool (Tall button) so I can choose between two clips placed in the same place. Once again, I did all this without having to move my mouse as much or having to take my hand off of it.
Can you see the recurring theme here? I keep mentioning the zoom function because it saves so much time. Each time I zoom in and out, it’s multiple key presses and I do this over and over and over when I’m precision editing. THESE seconds add up and the number of movements from the mouse to keyboard and the number of keystroke presses saved number in the hundreds per project.


99 Percent Of The Way
I finally jumped back to the keyboard when I had to create the title for “Coast.” So technically, I didn’t complete the whole short film without a keyboard, but you get my point. Though it started out as a challenge to see if I could go without the keyboard, this was definitely something I would do for every edit going forward. The ease of using the TourBox outweighs the small learning curve it takes to set it up and remember what button combinations do what?
If you use my downloadable preset, you’ve already saved yourself the time of having to customize it yourself. You just need to spend a little time getting used to it and you’ll be ready to go.
With more complicated projects, I could foresee times where I would quickly jump back to the keyboard for a thing or two, but 99% of what I would need to do in an edit can be done with the TourBox and a mouse.
Parting Remarks
I’ve since had the TourBox for a few months now and it has earned the rare permanent spot on my desk and in my travel bag because of how it has fundamentally changed the way I edit in Final Cut Pro X. I think it should be on every editor’s desk, even if they are a seasoned pro who has every shortcut memorized.

What I’ve yet to mention is the responsiveness or lack of lag when using the TourBox. On devices like the Palette Gear or even the LoupeDeck, one of my complaints was not having a tactile feel for the speed when turning a wheel or dial. The default scroll/wheel speed here feels very responsive, so I can turn a dial and know exactly where to stop.
The only things I would change for a future version is to add a C3 and C4 button since they are so small and take up so little space, or another Top button, which would open up at least 8 more shortcut combinations. It would also be nice to see bluetooth/wireless connectivity with the same level of responsiveness that the current TourBox has. The USB-C connection is fast and the braided cable looks very durable, but I like my devices to be free of wires. As for taking it on the road, the small size makes it easy to pack into my bag without taking up much space.
It’s a high recommendation for me, which is rare as far as accessories and devices go. I have a minimalist approach when it comes to my desk real estate and the TourBox fits right in with its compact size and matte black aesthetic.
Updated on February 11, 2026


Great post. I really appreciate the detail in your review of this device and your TB preset file. I just received my TourBox a few days ago and I’m surprised how invaluable it already feels.
Btw, I’m new to your site and really loving your work.
Thanks Edward! Hope you get some good use out of it. What programs are you mainly using it with?